Gather Your Materials and Tools
Before you begin the installation process, be sure to gather all of the necessary materials and tools. This includes the shower door, all hardware such as screws, brackets, and wall anchors, as well as any other tools you will need such as a drill, measuring tape, level, and caulk. Make sure you have these items on hand before you begin.
Measure and Mark the Opening
Using the measuring tape, measure the opening of the shower. Mark the measurements on the wall with a pencil. Make sure to double check your measurements before cutting or drilling.
Cut and Drill
Once you have your measurements, it is time to cut and drill. Use the drill to create any necessary holes for mounting the shower door. Then cut the opening to the exact measurements you marked earlier. Be sure to wear safety glasses and gloves when doing this.
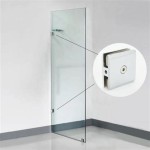
Mount the Shower Door
Place the shower door in the opening and make sure it fits properly. Secure the door to the wall with the brackets, screws, and wall anchors. Make sure the door is level and that all screws are tight.
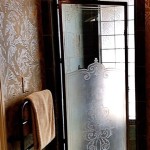
Caulk Around the Door
Once the door is mounted, use caulk to seal the gap between the door and the walls. This will help keep the shower watertight and ensure that it lasts for many years. Allow the caulk to dry before using the shower.
Final Steps
Once the caulk has dried, it is time for the final steps. Install the handle or knob and any other hardware that you need. Test the door to make sure it opens and closes properly. Once everything is working correctly, you can enjoy your newly installed glass shower door!


Related Posts