Installing a glass sliding door can be a great way to improve the appearance of your home and make it more energy-efficient. It is a fairly straightforward process, but there are some important steps you should take to ensure you get it right. In this article, we will explain how to install a glass sliding door in detail, including what tools and materials you will need, how to measure and cut the door, and how to secure it in place.
Tools and Materials
Before you begin, you will need to gather the necessary tools and materials, such as a level, a saw, drill, screws, a caulking gun, and shims. Additionally, you will need to purchase the glass sliding door itself, as well as any necessary hardware.
Measuring and Cutting the Door
Once you have all of your supplies, you will need to measure and cut the door to fit the opening. Start by measuring the height and width of the door opening, then use these measurements to cut the door frame to size. Make sure to leave a slight gap of about ¼ inch between the door and the frame.
Securing the Door
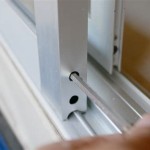
Once the door is cut to size, you can begin to secure it in place. Start by placing the frame in the opening and making sure it is level. Then, use screws to attach the frame to the wall, making sure to use shims to ensure a snug fit. Finally, use caulking to fill in any gaps between the door and the frame.
Conclusion
Installing a glass sliding door can be a great way to improve the appearance and energy-efficiency of your home. It is a fairly straightforward process, but there are some important steps you should take to ensure you get it right. By following the steps outlined in this article, you can install a glass sliding door with ease.


Related Posts