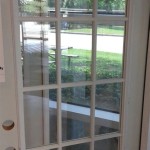
Replacing glass in a door can be a daunting task, but it can be done with the right tools and the right know-how. In this article, we’ll go over the steps and materials you’ll need to successfully replace the glass in your door.
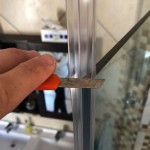
Step 1: Measure and Cut the Glass
The first step in replacing the glass in your door is to measure and cut the glass to fit the frame. Measure the frame carefully and record the measurements. Then, use a glass cutting tool to cut the glass to fit the frame. Make sure the glass is cut to the exact measurements for a proper fit.
Step 2: Install the New Glass
Once the glass is cut, you can begin installing it. Start by cleaning the frame and the glass with a damp cloth. This will help ensure a secure fit. Place the glass in the frame and use a sealant to secure it in place. Allow the sealant to dry before continuing.
Step 3: Secure the Frame
Once the glass is in place, you can secure the frame. Use a drill to attach screws to the frame. Make sure the screws go in deep enough to secure the frame. Once the frame is secure, add weatherstripping around the edges of the glass to help keep moisture out.
Step 4: Finish Up the Job
Finally, finish up the job by adding a layer of caulk around the outside edges of the frame. This will help ensure a tight seal and keep out any drafts or moisture. Once the caulk is dry, you’re done!
Tools and Materials You’ll Need
To successfully replace the glass in your door, you will need the following tools and materials:
- Glass cutting tool
- Measuring tape
- Glass
- Sealant
- Screws
- Drill
- Weatherstripping
- Caulk
With the right tools and materials, you can successfully replace the glass in your door. Follow the steps outlined in this article and you’ll have a new, secure door in no time.
:max_bytes(150000):strip_icc()/4-IMG_4624-56a4a2ca5f9b58b7d0d7efcb.jpg)


:max_bytes(150000):strip_icc()/14-finished-56a4a2cc5f9b58b7d0d7efdd.jpg)

:max_bytes(150000):strip_icc()/5-IMG_4631-56a4a2ca5f9b58b7d0d7efce.jpg)


/1-entry-door-56a4a2c85f9b58b7d0d7efc5.jpg)
/12-IMG_4647-56a4a2cc5f9b58b7d0d7efda.jpg)

Related Posts