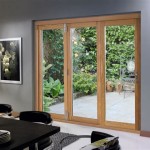
Replacing a glass panel in a door with wood is a great way to give your home a new look and increase the security of your home. The process is relatively simple, but it is important to take the necessary steps to ensure that the job is done correctly. In this article, we’ll discuss the different steps involved in replacing a glass panel in a door with wood, including the materials you’ll need and the tools you’ll need to complete the job.
Steps for Replacing a Glass Panel in a Door with Wood
The first step in replacing a glass panel in a door with wood is to remove the existing glass panel. This can be done by gently prying the panel away from the frame using a flat-head screwdriver. Once the glass panel is removed, you’ll need to measure the opening and cut the wood to the proper size. It’s important to use a saw that is designed for cutting wood, rather than one designed for cutting metal or plastic.
Once the wood is cut to the proper size, it’s time to install the new panel. The easiest way to do this is to use a construction adhesive to secure the panel in place. You’ll also need to secure the panel with screws, making sure to use the right type of screws for the type of wood you’re using. After the panel is secured, you can paint or stain it to match the existing door.
Tools and Materials Needed to Replace a Glass Panel in a Door with Wood
When replacing a glass panel in a door with wood, you’ll need the following tools and materials:
- Flat-head screwdriver
- Measuring tape
- Saw designed for cutting wood
- Wood of the correct size
- Construction adhesive
- Screws for the type of wood you’re using
- Paint or stain, if desired
Conclusion
Replacing a glass panel in a door with wood is a relatively simple project that can be completed in just a few hours. All you’ll need is the right tools and materials, and you can give your home a fresh, new look in no time. With the steps outlined in this article, you’ll have no trouble replacing the glass panel in your door with wood.


:max_bytes(150000):strip_icc()/5-IMG_4631-56a4a2ca5f9b58b7d0d7efce.jpg)


Related Posts