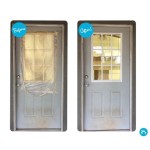
Replacing a storm door glass insert can be a daunting task, but it doesn’t have to be. With the right tools and knowledge, you can easily replace the glass insert on your storm door and get back to enjoying your home. This article will provide an overview of the process and materials you will need to replace the glass insert on your storm door.
Tools and Materials
Before you begin, you will need to gather the necessary tools and materials. The most important tool you will need is a replacement glass insert. You can purchase a glass insert from your local hardware store or online. Additionally, you will need a screwdriver, a putty knife, and a drill with a hole saw bit.
Preparing the Door
Once you have all of the necessary tools and materials, you will need to prepare the door. Begin by removing the existing glass insert and the frame around it. Use the putty knife to scrape off any old putty or sealant. Then, using the screwdriver, remove any screws that are securing the frame of the glass insert.
Measuring and Cutting
The next step is to measure and cut the new glass insert to size. Measure the opening of the door frame and use the hole saw bit on the drill to cut the glass insert to the appropriate size. Make sure that the edges of the glass insert are smooth and even. If there are any rough edges, use sandpaper to smooth them out.
Installing the Glass Insert
Once the glass insert is cut to size, you can begin installing it. Start by applying a thin layer of putty or sealant around the edges of the opening in the door frame. Then, place the glass insert into the opening and press it into the putty or sealant. Use the screws to secure the frame of the glass insert to the door frame.
Conclusion
Replacing a storm door glass insert is a relatively straightforward process. With the right tools and knowledge, you can easily replace the glass insert on your storm door. Just remember to measure and cut the glass insert to size, apply a thin layer of putty or sealant, and secure the frame with screws.


Related Posts