Sliding glass doors offer a great way to bring a bit of the outdoors into your home. Unfortunately, the screens can become damaged over time, and need to be replaced. Replacing a sliding glass door screen is a relatively simple task, and can be done in a few steps.
Gather the Necessary Materials
Before starting the replacement process, you will need to gather the necessary materials. These include a new sliding glass door screen, a utility knife, a screwdriver, and a tape measure. Make sure you measure the existing screen before purchasing a new one, so that you get the correct size.
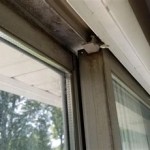
Removing the Old Screen
To remove the old screen, use a screwdriver to remove the screws that are holding the screen in place. Carefully remove the screen, and set it aside. Once the screen is removed, use a utility knife to cut away any old putty or caulk that is still present. This will ensure that the new screen fits properly.
Installing the New Screen
Once the old screen has been removed, it is time to install the new one. Start by placing the new screen in the frame, and use a screwdriver to secure it in place. Once the screen is in place, use putty or caulk to seal any gaps between the screen and the frame. Make sure to wipe away any excess putty or caulk before it dries.
Finishing Touches
After the new screen has been installed, there are a few finishing touches that can be done to make sure it looks its best. Start by wiping away any dust or dirt that may have collected on the frame. You can also use a cloth to buff away any scratches that may have occurred during the installation process. Finally, use a bit of furniture polish to make the frame shine.
Conclusion
Replacing a sliding glass door screen is a relatively straightforward process that can be done in a few simple steps. Start by gathering the necessary materials, removing the old screen, installing the new one, and making a few finishing touches. With a bit of care and patience, you can have your sliding glass door looking like new in no time.


Related Posts